
If you've ever wondered aloud about how to add closed captioning to a video, you're not alone. Videos dominate the marketing landscape today. With fewer people consuming traditional TV and old-school ads these days, viewers' attention is increasingly turning online.
To reach an audience with engaging content there, videos are essential. But still, we can't forget to add text 📝.
Table of Contents
Summary
Our content must be accessible, including to those in the deaf and hard hearing community. Subtitles allow viewers who prefer other languages to enjoy our material, too. And what about when videos are automatically muted to those on Facebook or Instagram? When you add captions to your videos, the options for viewers open up.
What type of videos need closed captions?
Closed captions aren't just a nice-to-have; they're essential for making your video content accessible to everyone, whether you're publishing to Youtube, your website, or elsewhere on the internet.
So, what types of videos should have them? The short answer is: all of them. Whether it's a product tutorial, a vlog update, or a webinar, adding captions ensures that your message reaches the widest audience possible.
This isn't simply a compliance checkbox, either. It's an opportunity to be inclusive and expand your viewership. After all, the more people who can understand your video, the greater impact it will have.
Are you looking for more in-depth assistance with your web presence? Schedule a discovery call with me and we'll see what Mythic can do for you and your team.
Closed captions vs. subtitles: what's the difference?
With online video, you'll encounter two key players: closed captions and subtitles (open captions, those burned into a video and cannot be turned off, will be covered in a future article). While they may seem similar, each serves a distinct purpose, and knowing when to use which can make all the difference in your video's impact.
Closed Captions: Again, we're talking about more than just accessibility. Closed captions provide a textual rendition of the spoken dialogue, as well as other auditory elements like sound effects, speaker identification and background noise.
But their utility doesn't stop there. Have you ever scrolled through social media and watched a video with the sound off? Many platforms auto-mute videos, making captions a must-have for grabbing attention. They also come in handy in noisy environments or places where audio is frowned upon, like libraries or late-night binge-watching while your partner sleeps.
Subtitles: These are your linguistic ambassadors. Subtitles focus solely on translating the spoken dialogue into another language, without capturing additional auditory elements. They're amplify your global reach, helping you connect with audiences who speak different languages but share similar interests or needs.

In summary, closed captions make your content both accessible and versatile. Subtitles, meanwhile, are your passport to international engagement. Both have their merits, but they serve different audiences and situations.
Knowing the difference is the first step in making your videos truly universal.
When online videos could use subtitles
Subtitles and closed captions may seem like twins but as we've learned, they serve different purposes. While closed captions are all about accessibility, subtitles are your go-to for reaching an overseas audience.
So when should you sprinkle in some subtitles? Whenever you're aiming to cross language barriers. If you've got a killer video that you think could resonate with people who speak a different language, subtitles are your passport to international acclaim.
In a nutshell, add subtitles when you're ready to take your content beyond an English-speaking audience. It's not just about translation; it's about making as big of an impact as possible.
Automatically add closed captions to video in Youtube
Adding captions and subtitles to your YouTube videos is easier than you might think, and you don't need to be a tech wizard to do it. YouTube offers an auto-generate feature that can create subtitles for you. Here's a quick guide on how to make it happen.
Note: this feature uses speech recognition technology to create subtitles. While it's not 100% accurate, it's a good starting point that you can later edit for precision.
Step-by-step instructions
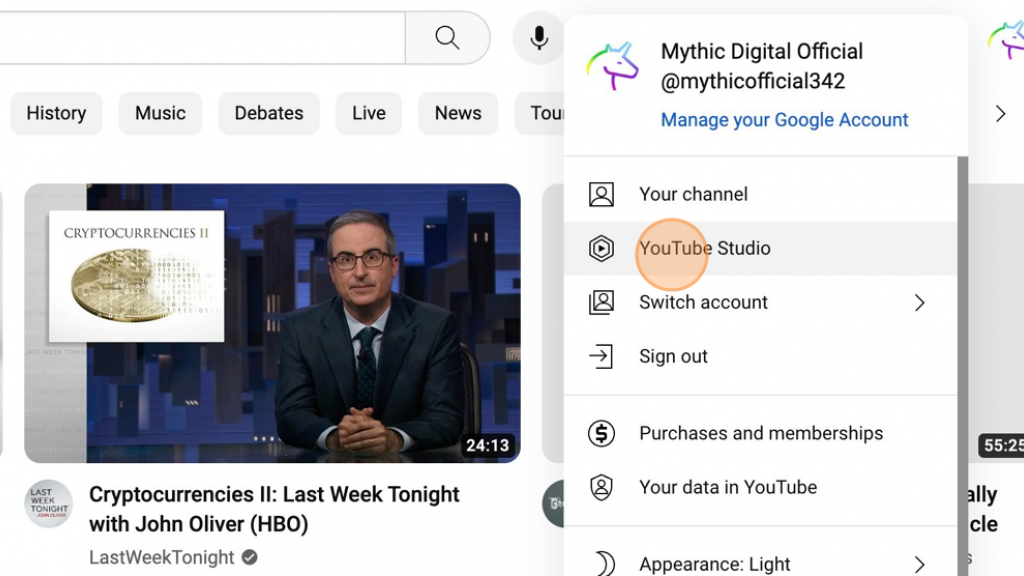
- Log in to YouTube Studio: Open YouTube and click on your profile icon.
2. Select "YouTube Studio" from the dropdown.
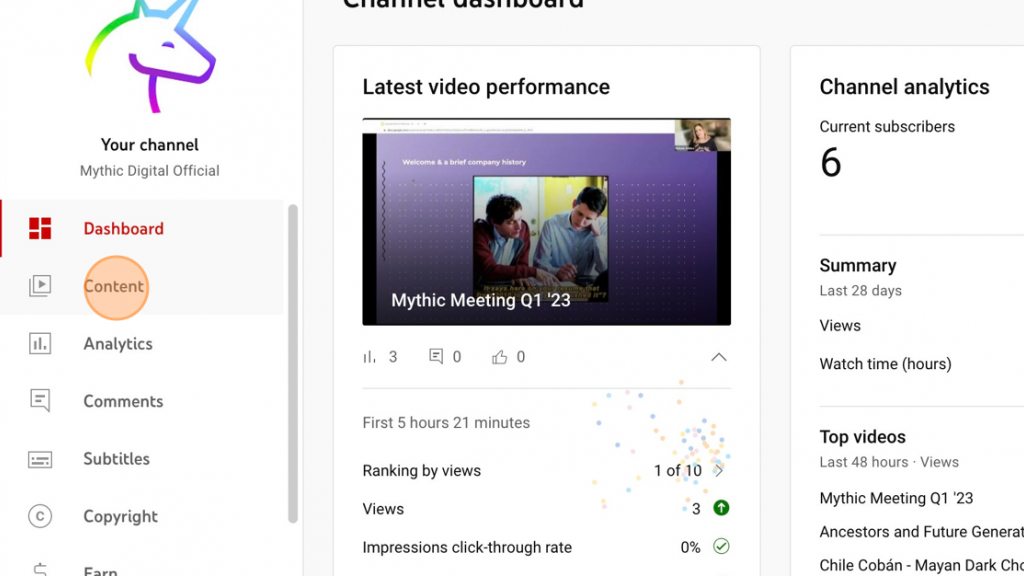
3. Navigate to Videos: On the left sidebar, click on "Content."
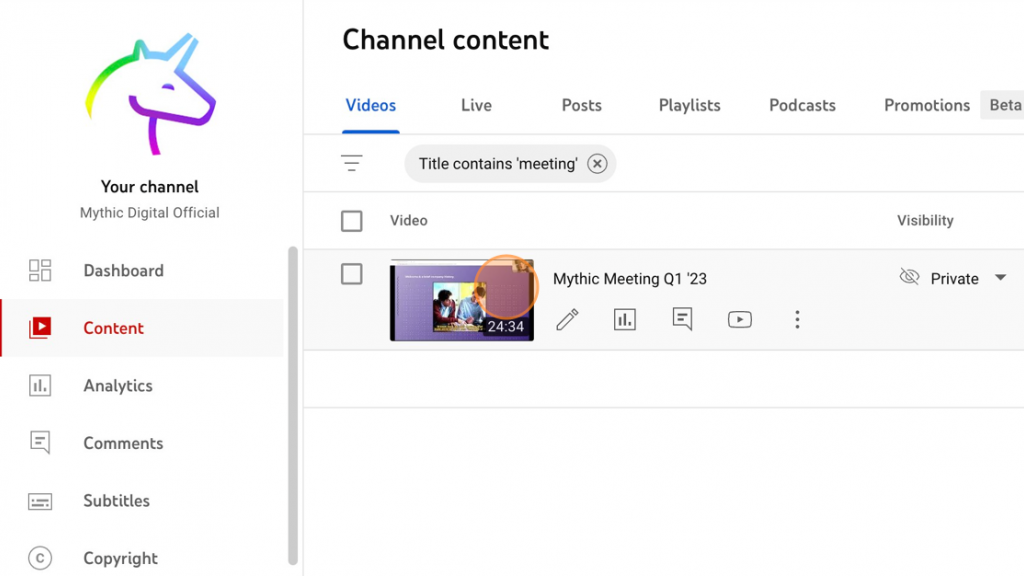
4. Select Your Video: Choose the video you want to add subtitles to and click on it.
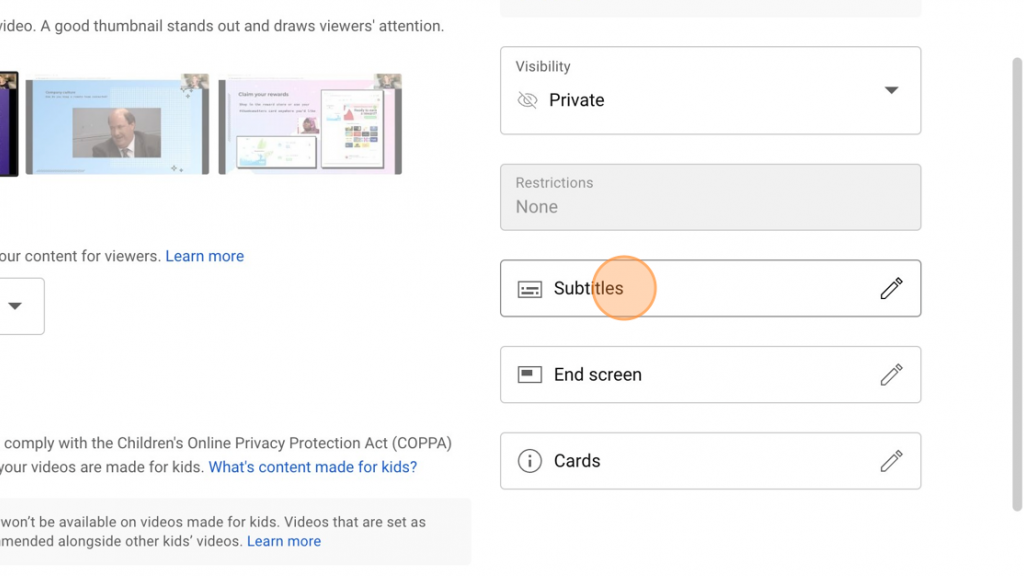
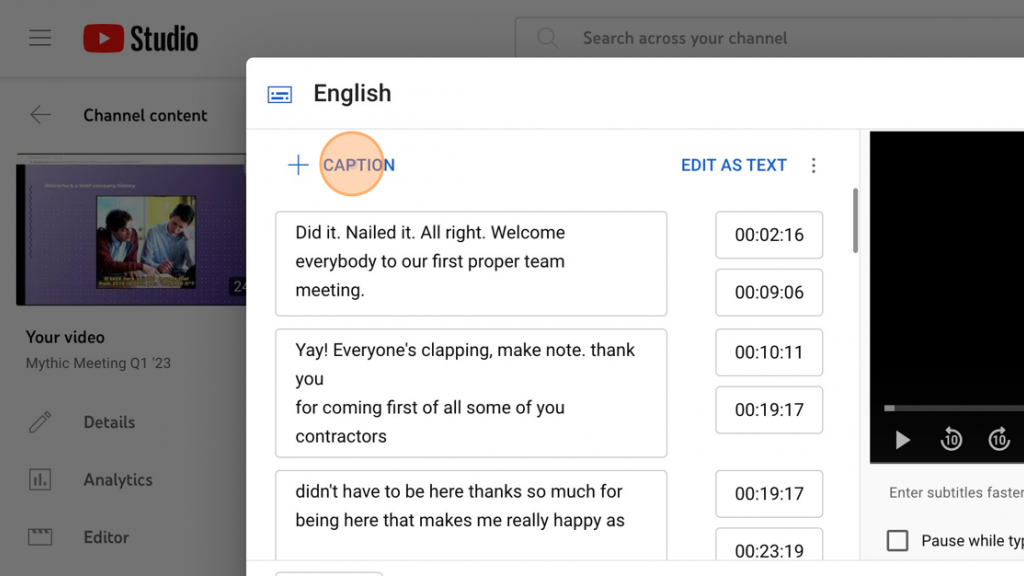
5. Open Subtitles Menu: Under the video preview, you'll see a menu. Click on "Subtitles." In this case, adding English subtitles to content with the same language serves as the closed captions.
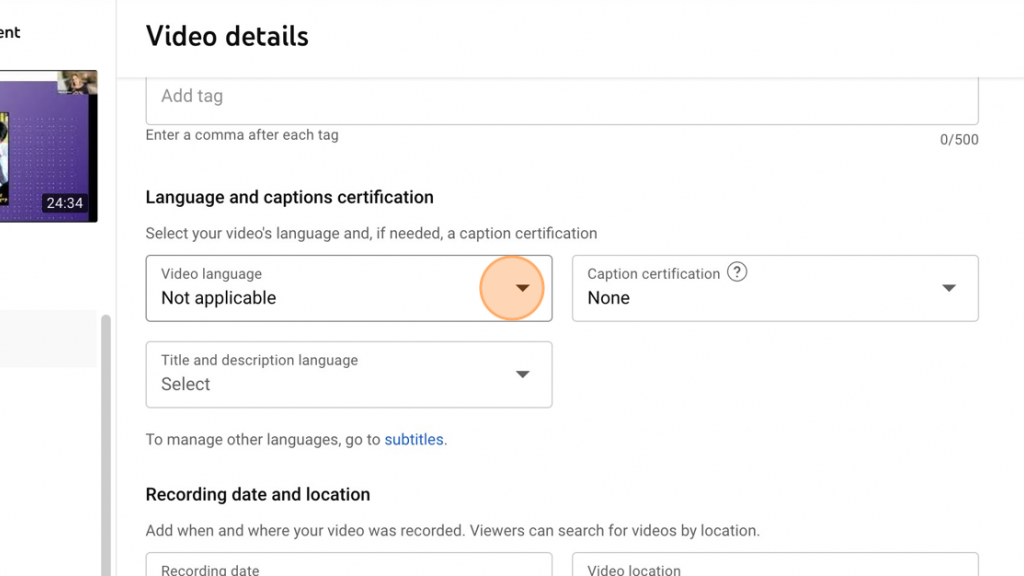
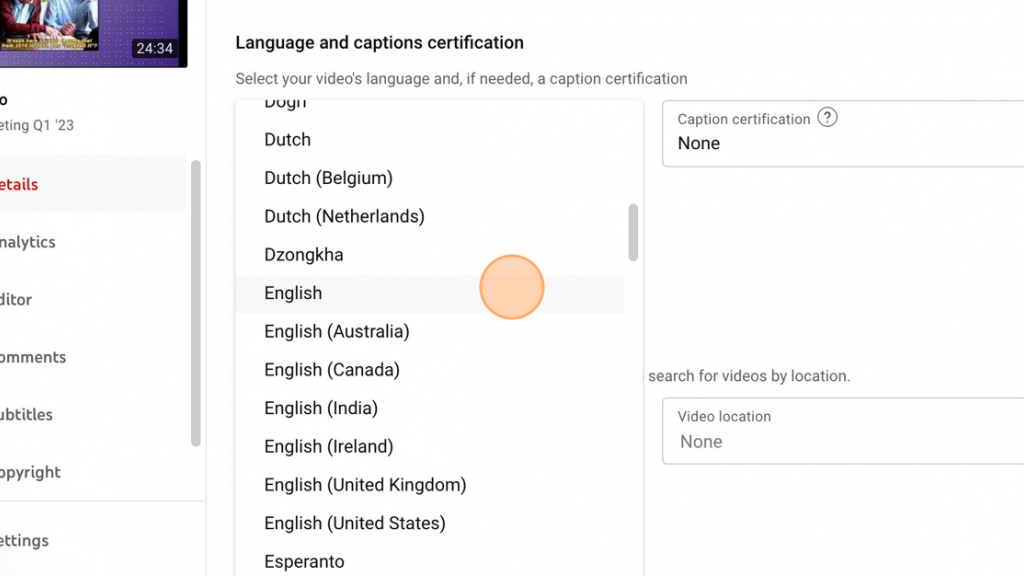
6. Choose Language: If you haven't already, you'll be prompted to set the video's language.
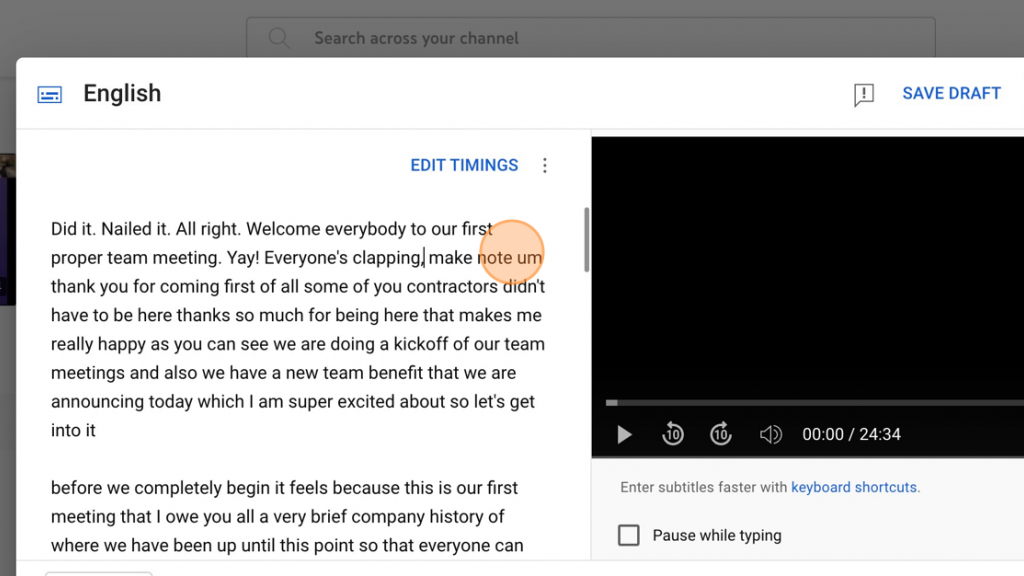
7. Auto-Generate & Enable: YouTube will automatically create subtitles for your video using voice recognition. Please note that the audio should be as clear and possible, without long pauses at the beginning, etc. More on this topic here. The auto-generated captions will appear like below.
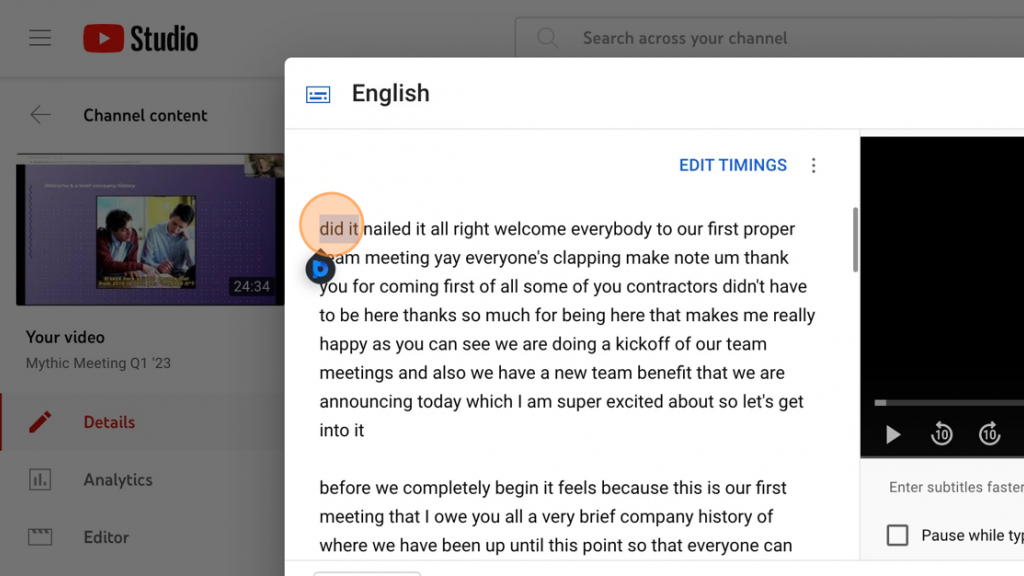
8. You can now edit them for clarity, if you like.

Don't worry about the time stamps at this point. Just keep editing. If the person is speaking at a consistent pace, YouTube will align them well - and we can doublecheck (see next section).
9. Once you've finished editing, click "Done" in the upper right corner.
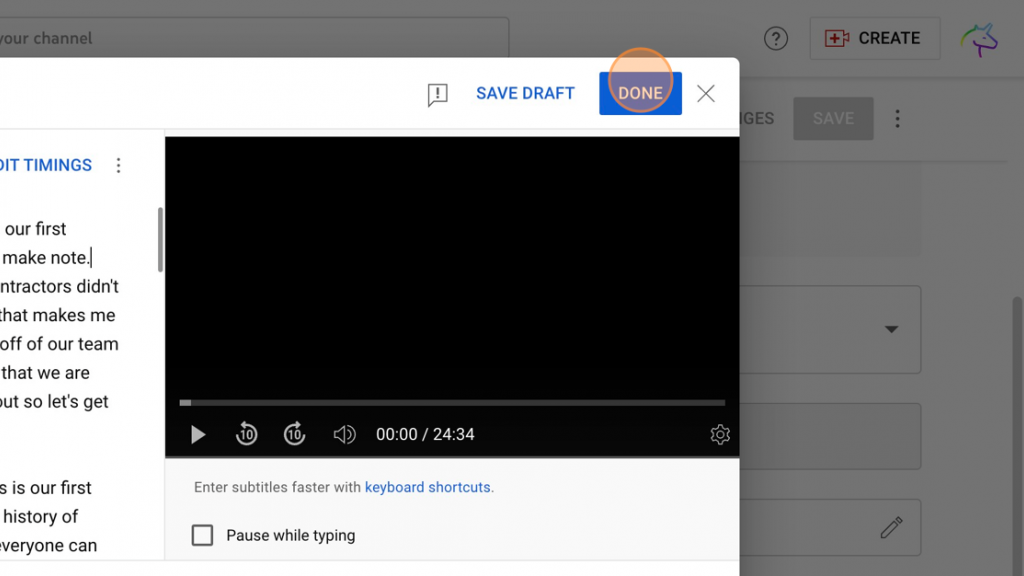
10. Watch the beginning of your video to make sure your edits were processed (there may be processing delays for longer videos).
And there you have it! You've just added video subtitles easily, broadening its appeal and making it more accessible.
Remember, while auto-generated video captions and subtitles are convenient, they're not foolproof. Always double-check for accuracy to ensure your message is crystal clear.
Adding captions to parts without a speaker
Do you have some awesome introduction music at the beginning of your video? Are there sound effects or other important nonverbal audio that would need to be written for a non-listening user?
You can add your own captions to whatever portion of the video you need. Here's how.
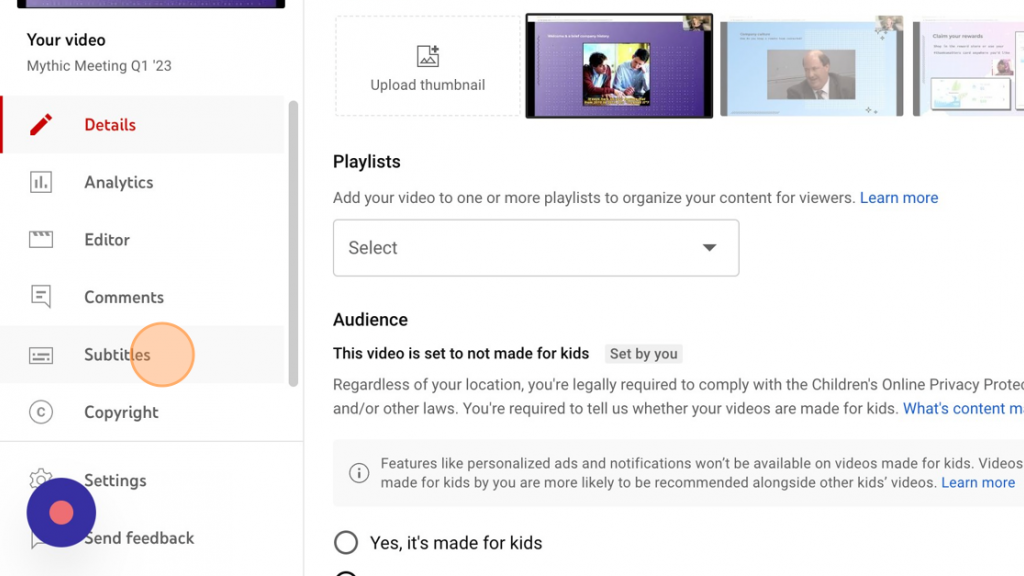
1. Navigate back to the Studio and click on the video you're editing.
2. Click "Subtitles" from the left navigation.
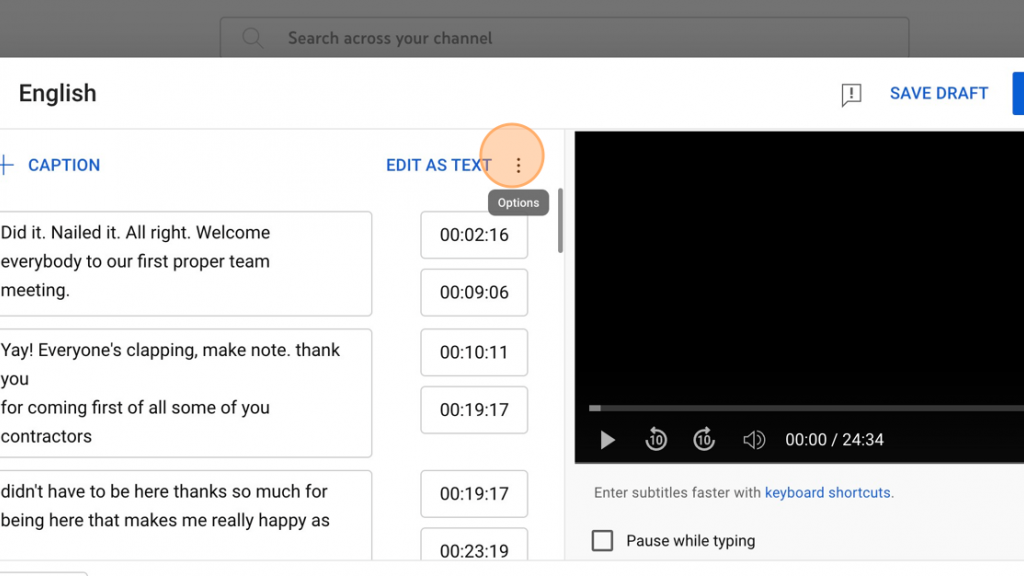
3. Click "EDIT" next to more recent subtitles/captions.

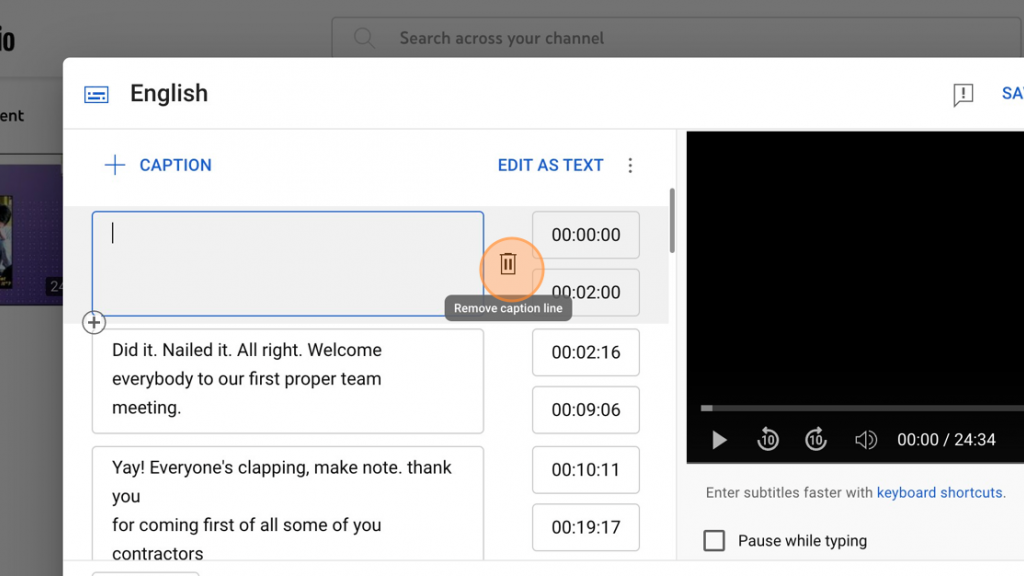
4. Click "CAPTION" next to the plus icon.
5. You can now add your own text, or delete it if you need.
Edit the timing of text in your video
As mentioned, the algorithm is pretty accurate (and always improving). With that said, it's good to doublecheck and make any changes necessary so that the content is understandable and thus. You might also want to download the finished text file for future use.
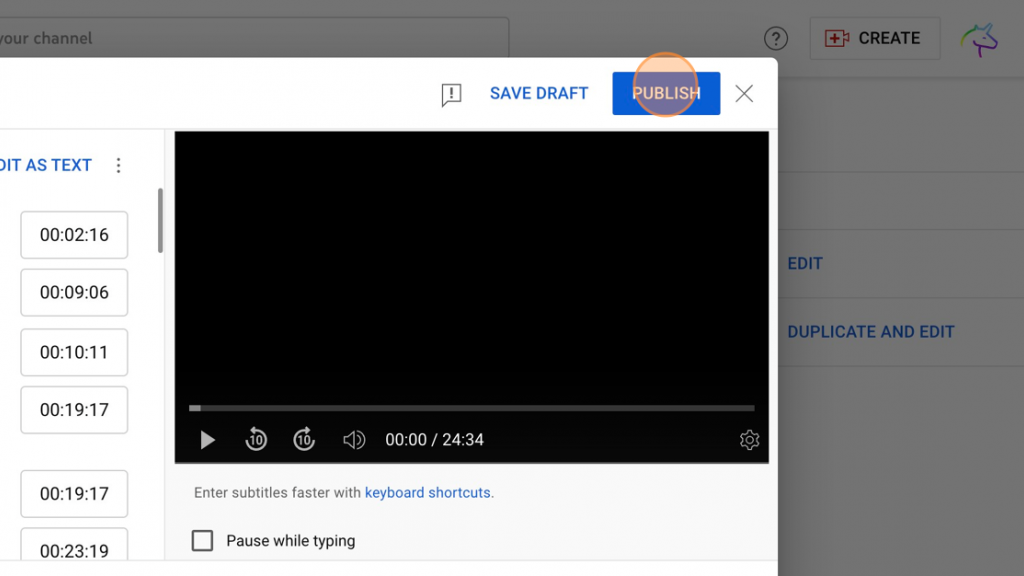
1. From within the "Subtitles" same screen as the above steps, click "EDIT TIMINGS" in blue above the text.
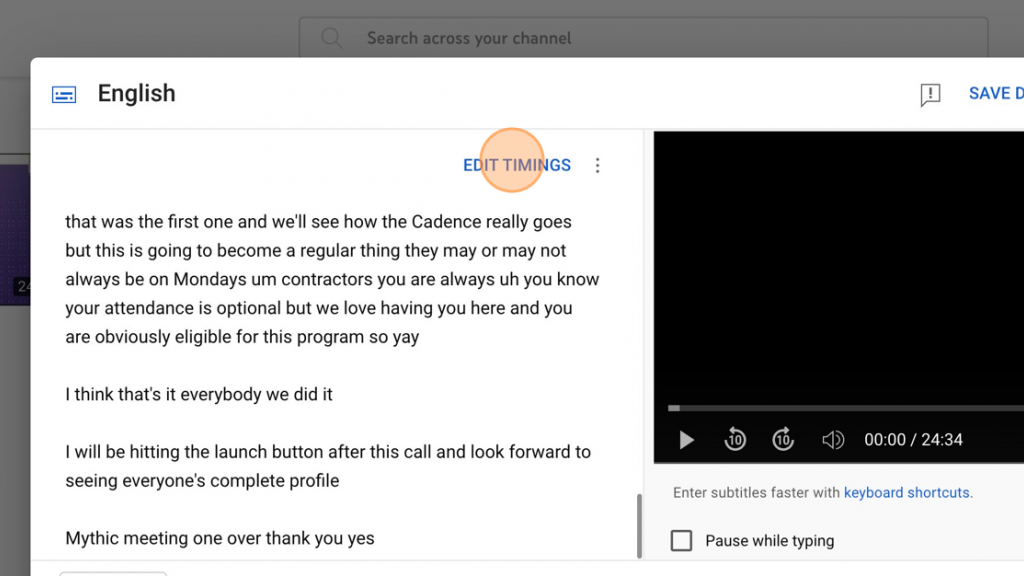
2. You can now edit the start and end times that correlate to a given section of text.
3. Once you're all set, click "PUBLISH" and your changes will be saved.
More options for adding subtitles, captions in YouTube
So you're looking to go beyond the basics and explore more options for adding subtitles and captions to your YouTube videos? You're in the right place. Let's dive into some of the alternative methods that can help you get this done.
Manually type your captions, subtitles to a videos
If you're after the easiest solution and want full control over the text, manually typing your captions is the way to go. Simply play the video file and pause to type the audio portions into a text box. Of course, for subtitles you'll either need to speak both languages or get some help. This method ensures accuracy but can be time-consuming.
Upload a text file
For those who have an SRT file or any of the other supported formats prepared, uploading it directly to YouTube is a quick and efficient method. Navigate to the "Subtitles" tab and look for the "Import Media" option to upload your SRT file. Doing this eliminates the need for manual typing and ensures synchronization.
Youtube supports other text file types as well for this purpose. There are many, but those most commonly used include:
- Subviewer (.sbv or .sub)
- MPsub (mpsub)
- LRC (.lrc)
So...what's an SRT file and how can I get one?
An SRT file, short for "SubRip Text," is a plain text document that contains both the timing and textual content of your video's subtitles. It's one of the most commonly used formats for subtitles and is supported by most video platforms, including YouTube.
So how do you get your hands on an SRT file? You have a couple of options:
Create One Yourself - You can manually create an SRT file using a simple text editor. Notepad is ideal for Windows users, with Mac owners TextEdit is the simplest option. You'll need to input the start and end times next to the corresponding text. Save it with an .srt extension, and it's ready to be uploaded.
Use a Captioning Service - There are various online services that can generate an SRT file for you. Simply upload your video, and they'll take care of the rest. This is often the easiest solution if you're not keen on doing it manually, though higher costs usually apply.
Export from Editing Software - If you're using video editing software like Adobe Premiere Pro, look for an option to export captions or subtitles. Many programs offer the ability to save these as an SRT file.
Having an SRT file not only makes the upload process smoother, it also ensures that you can use the same captions across different digital environments, including social media platforms. It's a versatile tool in making your content more in line with current accessibility standards.
Use the auto-synch feature
YouTube's auto-sync feature is another way to add captions without manual labor. Upload an audio file along with your video file, and YouTube will automatically sync the two. However, be cautious of subtitle delay, as it may require some adjustments.
Download your finished text document for the future
Once you've perfected your captions or subtitles, it's a good idea to download the file you created for future use. This saves you the hassle of redoing the work and ensures you have a backup.
And there you have it! Whether you're manually typing, uploading an SRT or some other file, or trying out YouTube's auto-sync, these options offer flexibility to make your content accessible and appealing to a larger audience.
Fit your captions to other social media platform
So you've got your captions ready to go, but what about sharing your video across different social media platforms? Each platform has its own quirks and requirements.
LinkedIn allows you to upload a .srt alongside your video. Given the professional audience, clear and accurate captioning can make your content stand out and appear more polished 🪩.
For Instagram posts, you can either burn text directly into the video (aka "option captions") or use the platform's auto-captioning feature. Keep in mind that Instagram users often watch videos without sound, so captions are a must for grabbing attention.
Facebook offers its own auto-captioning tool, but you can also upload a .srt for more accuracy. Given that Facebook videos auto-play without sound in the feed, captions can significantly improve engagement.
Twitter (X)
Twitter doesn't have a built-in captioning tool, so you'll need to embed them into the video file before uploading (aka open captions). Short and sweet is the name of the game here, as you're working with a limited timeframe.
TikTok
TikTok does have a built-in captioning functionality, but it's always a good idea to double-check for accuracy. The fast-paced nature of TikTok videos makes captions especially useful for keeping viewers engaged.
By tailoring your captions to fit the specific needs and features of each social media platform, you're making sure that your video content is as accessible and engaging as possible, no matter where it's viewed.
Wrapping it up
So you're on your way to becoming a pro at adding subtitles and closed captions, not just on YouTube but across social media platforms. It's more than just text on a screen; it's about making your content accessible and resonating with a broader audience. Now you're all set to make your videos truly universal. Happy captioning!